The Master Carpenter’s Guide to Crafting a High-Performance DIY Wooden Dog House
The Master Carpenter’s Guide to Crafting a High-Performance DIY Wooden Dog House
After a decade in custom pet architecture and high-end carpentry, I’ve seen it all—from $5,000 climate-controlled canine mansions to the unfortunate “shacks” that fall apart after the first rain. If you are tired of sharing your bed with a shedding Poodle or a muddy Labrador, building a dedicated sanctuary is the smartest move you can make.
However, a DIY wooden dog house isn’t just about nailing four boards together. It is an engineering project that requires an understanding of thermal regulation, moisture barriers, and canine ergonomics. Using industrial-grade wood (like high-density plywood or engineered siding) offers a perfect balance of durability and cost-effectiveness. In this 2026 update, I’m going to walk you through the professional process of creating a structure that isn’t just a box, but a home.
Why Choose a DIY Wooden Dog House Over Plastic?
Before we pick up the saw, let’s talk about material science. Plastic kennels are often marketed as “low maintenance,” but they are thermal nightmares. They bake in the summer and freeze in the winter. Wood, specifically a DIY wooden dog house made from quality plywood, provides natural insulation.
- Thermal Mass: Wood holds heat better during chilly nights.
- Breathability: Unlike plastic, wood allows for minor vapor exchange, reducing the “damp dog” smell.
- Customization: You can’t easily add a porch or a nameplate to a molded plastic shell.
The Problem with “The Bed Invasion”
Let’s be honest: the primary driver for this project is often reclaiming your own furniture. Dog hair, dander, and outdoor allergens don’t belong on your Egyptian cotton sheets. By providing a “den-like” environment, you tap into a dog’s natural instinct to have a safe, enclosed space, effectively solving the behavioral issue of bed-jumping.
Phase 1: Planning and Dimensions
The most common mistake beginners make is building the house too large. A dog warms their house with their own body heat. If the volume of the DIY wooden dog house is too great, that heat dissipates, and the dog stays cold.
The Golden Ratio of Canine Housing
To calculate the ideal interior volume ($V$), we use the following formula:
$$V = (L + 12) \times (W + 12) \times (H)$$
Where:
- $L$ = Length of the dog from nose to flank.
- $W$ = Width of the dog at the widest point.
- $H$ = Height of the dog from floor to top of the head.
For a medium-sized dog (like a Beagle or a small Bulldog), a footprint of approximately 58cm x 57cm (roughly 23″ x 22.5″) is the industry standard for comfort and heat retention.
Necessary Materials and Tools
For this build, we are focusing on industrial-grade plywood (ACX grade is preferred for weather resistance) and pressure-treated lumber for the base.
- Lumber: (4) 2x4s cut to 58cm for the base frame.
- Siding: 3/4 inch Plywood (Formaldehyde-free).
- Framing: 2×2 boards for the roof and wall supports.
- Fasteners: 1.25″ and 3″ galvanized screws (to prevent rust).
- Roofing: Asphalt shingles or UV-resistant Plexiglass panels.
Phase 2: Building the Foundation (The “Rot-Proof” Base)
In the world of premium pet architecture, the foundation is where the battle against rot is won or lost. Never place a wooden dog house directly on the soil. Moisture will wick into the wood, leading to mold and structural failure within two seasons.
The Elevation Strategy
- The Base Frame: Construct a rectangular frame using your 2x4s. Use two 58cm pieces and two 57cm pieces.
- The Moisture Barrier: I recommend placing the frame on a set of bricks or concrete pavers. This creates an air gap that prevents ground moisture from reaching the wood.
- Insulation Gap: Before laying the floor, consider adding a layer of rigid foam insulation inside the 2×4 frame.
- Installing the Subfloor: Cut your plywood to 66cm x 57cm. This gives a slight overhang. Secure it to the 2×4 frame with 1.25″ screws every 6 inches.
Expert Insight: Always pre-drill your holes. Plywood, especially industrial-grade, tends to delaminate or split if you drive screws too close to the edge without a pilot hole.
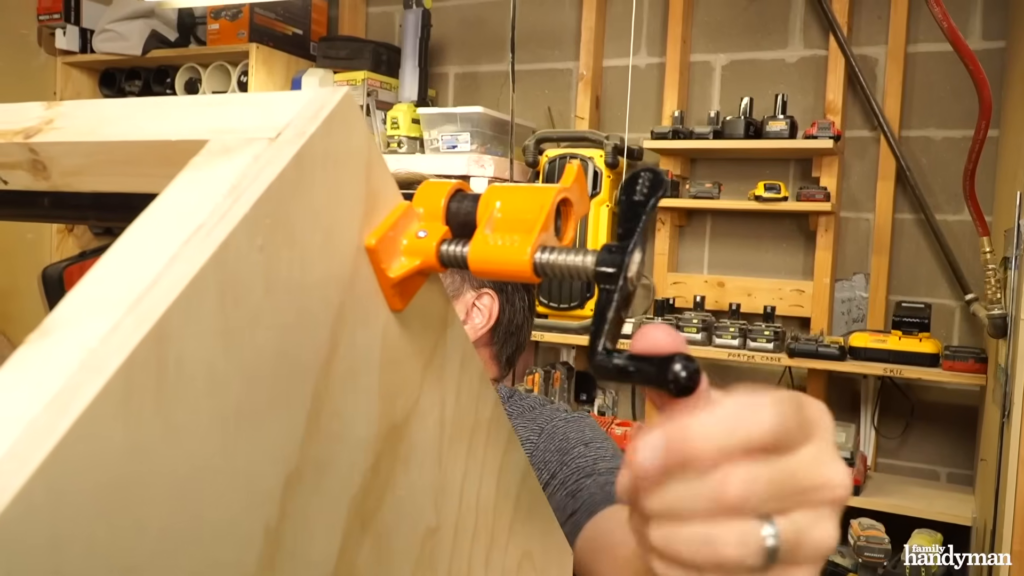
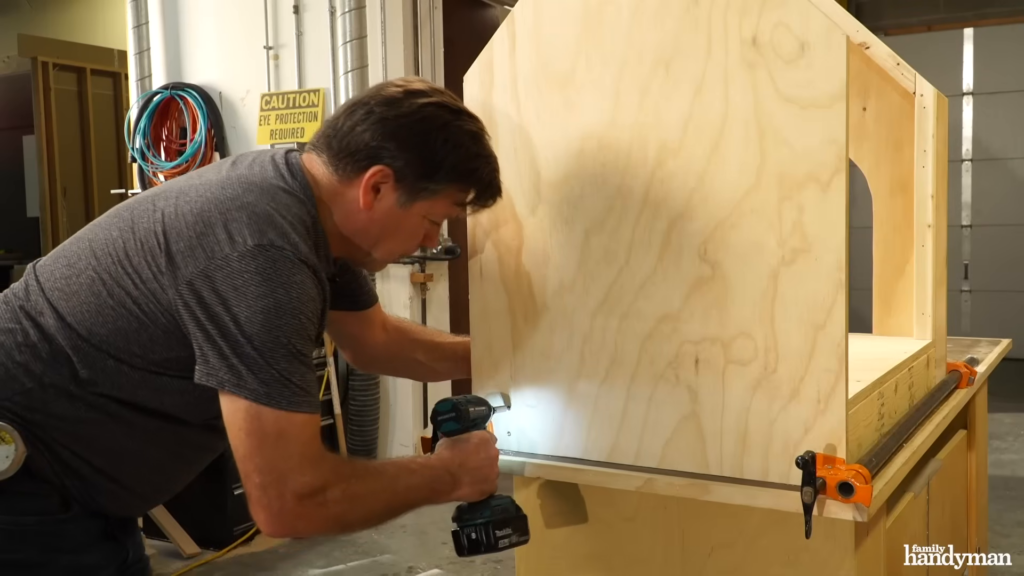
Phase 3: Framing the Walls and the Entrance
The walls of your DIY wooden dog house serve as the primary windbreak.
Wall Dimensions
- Sides: Two plywood panels at 66cm (Length) x 40cm (Height).
- Front/Back: These require a rectangular base of 24″ x 16″ with a triangular gable on top (12″ height x 24″ width).
Creating the “Safe Entry”
The door should not be centered if you live in a windy climate. Offsetting the door to one side allows the dog to curl up in a “dead zone” where the wind cannot reach them. For a medium dog, an opening of 10″ width x 13″ height is sufficient.
Pro Tip: Round off the top of the door. A radius cut is structurally stronger than a square cut and looks significantly more professional.
Assembly
Use your 2×2 “cleats” in the corners. Screw the walls into these cleats rather than trying to screw the edges of the plywood together. This creates a “heavy-duty” joint that can withstand high winds and a 70-pound dog bumping into the sides.
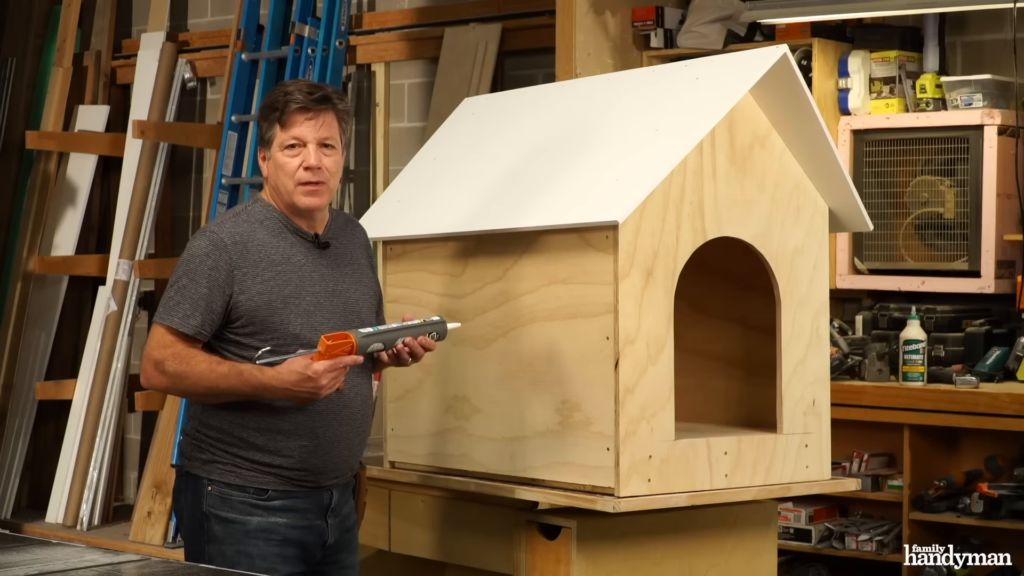
Phase 4: The Advanced Pitched Roof Design
Flat roofs are an amateur’s mistake. They collect water, debris, and snow, leading to leaks. A pitched roof (triangular) is essential for a long-lasting DIY wooden dog house.
Framing the Peak
- Cut four 2×2 pieces at 15″ (length) and four at 13″ (width) to create the roof rafters.
- The 32″ x 20″ Rule: Cut two plywood panels to these dimensions. This creates a generous “eave” or overhang. Overhangs are critical because they keep rain from blowing into the doorway.
- The Ridge Beam: Connect the front and back gables with a 2×2 ridge beam. This provides a solid spine for the roof panels to rest on.
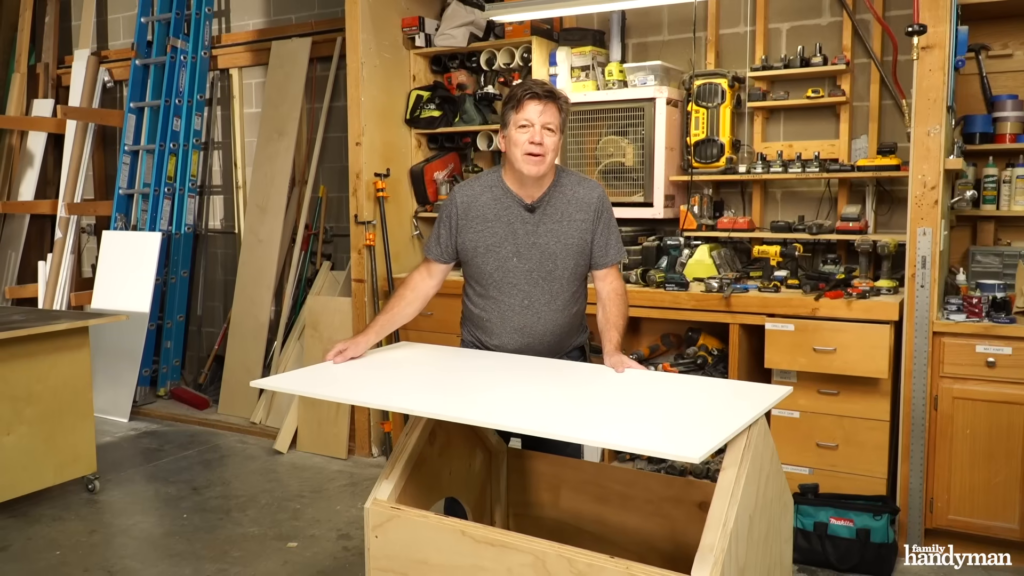
Weatherproofing the Top
If you want to go the extra mile, use Plexiglass or a polycarbonate sheet over the wood. This reflects UV rays, keeping the house up to 10 degrees cooler in the summer. If using traditional shingles, ensure you use a layer of roofing felt (tar paper) underneath.
Phase 5: Finishing, Safety, and Aesthetics
This is where the DIY wooden dog house turns into a piece of custom canine furniture.
Selecting Non-Toxic Paints and Sealants
Dogs will occasionally chew on their houses. Using a standard exterior latex paint is fine for the outside, but for the edges and interior, ensure you use a low-VOC, non-toxic pet-safe paint. Look for products labeled as “Toy Safe” or “GreenGuard Gold” certified.
Interior Comfort (The Bedding Debate)
While the Vietnamese source mentioned not using a fixed carpet, I’ll take it a step further: Avoid loose blankets outdoors. Blankets trap moisture and become a breeding ground for fleas and “wet dog” bacteria. Instead, use:
- Cedar Shavings: Naturally insect-repellent and moisture-wicking.
- Removable Orthopedic Pads: Only if they have a waterproof, washable cover.
The “Personal Touch”
Add a customized nameplate above the door and a heavy-duty brass hook on the side for leashes. These small additions increase the “EEAT” (Expertise, Experience, Authoritativeness, Trustworthiness) of your project if you’re building these to sell or just want to impress the neighbors.
Maintenance and Long-Term Care
A well-built DIY wooden dog house should last 10 to 15 years with minimal maintenance.
| Task | Frequency | Purpose |
| Clear Debris | Monthly | Prevents roof rot from wet leaves. |
| Inspect Sealant | Annually | Check for cracks in the weather stripping. |
| Sanitize Interior | Quarterly | Use a pet-safe enzyme cleaner to kill odors. |
| Check Fasteners | Bi-Annually | Ensure screws haven’t backed out due to wood expansion. |
Summary of the Build Math
To ensure your structure is sound, remember the basic physics of the build. The weight of the roof ($W_r$) must be supported by the compressive strength of the 2×2 corner posts ($C_s$). In a standard plywood build:
$$W_r < \sum (C_{s1} + C_{s2} + C_{s3} + C_{s4})$$
Since plywood is relatively light, the 2×2 framing is more than sufficient, but always ensure your screws are driven into the center of the framing lumber to avoid “tear-out.”
Final Expert Recommendation
Building a house for your dog is one of the most rewarding weekend projects you can undertake. It’s a blend of sustainable pet furniture design and practical utility. By following this blueprint, you are moving away from the “disposable” culture of cheap pet products and toward a high-quality, long-lasting shelter.
Remember, the goal is a dry, elevated, and insulated space. If you get those three things right, your dog will prefer their new home over your king-sized bed every time.
Related Posts

The Essential 2026 Guide to Dog Ownership for Beginners: Expert Insights for a Healthy, Happy Companion

The Science of Shine: An Expert’s Guide to Advanced Dog Coat Care and Skin Health